1 申请服务器
既然是对接服务器开发,自然首先需要有一个服务器,推荐服务器购买地址:服务器购买地址
2 配置服务器
这里以flask,python为例子搭建服务器(1)安装/更新需要用到的软件
安装python3.8版本以上

安装flask

安装libxml2, libxslt, lxml python
(2)编辑代码vim app.py
from flask import request

@app.route('/')
def handle():
    try:
        data = request.args
        if len(data) == 0:
            return "hello, this is handle view"
        signature = data.get('signature')
        timestamp = data.get('timestamp')
        nonce = data.get('nonce')
        echostr = data.get('echostr')
        token = "xxxx" # 请按照公众平台官网\基本配置中信息填写

        lst = [token, timestamp, nonce]
        lst.sort()
        sha1 = hashlib.sha1()
        sha1.update(''.join(lst).encode('utf-8'))
        hashcode = sha1.hexdigest()
        print("handle/GET func: hashcode, signature: ", hashcode, signature)
        if hashcode == signature:
            return echostr
        else:
            return ""
    except Exception as e:
        return str(e)

if __name__ == '__main__':
app.run("0.0.0.0", 80, debug=True)(3)运行服务执行命令python app.py 80
3 开发者配置
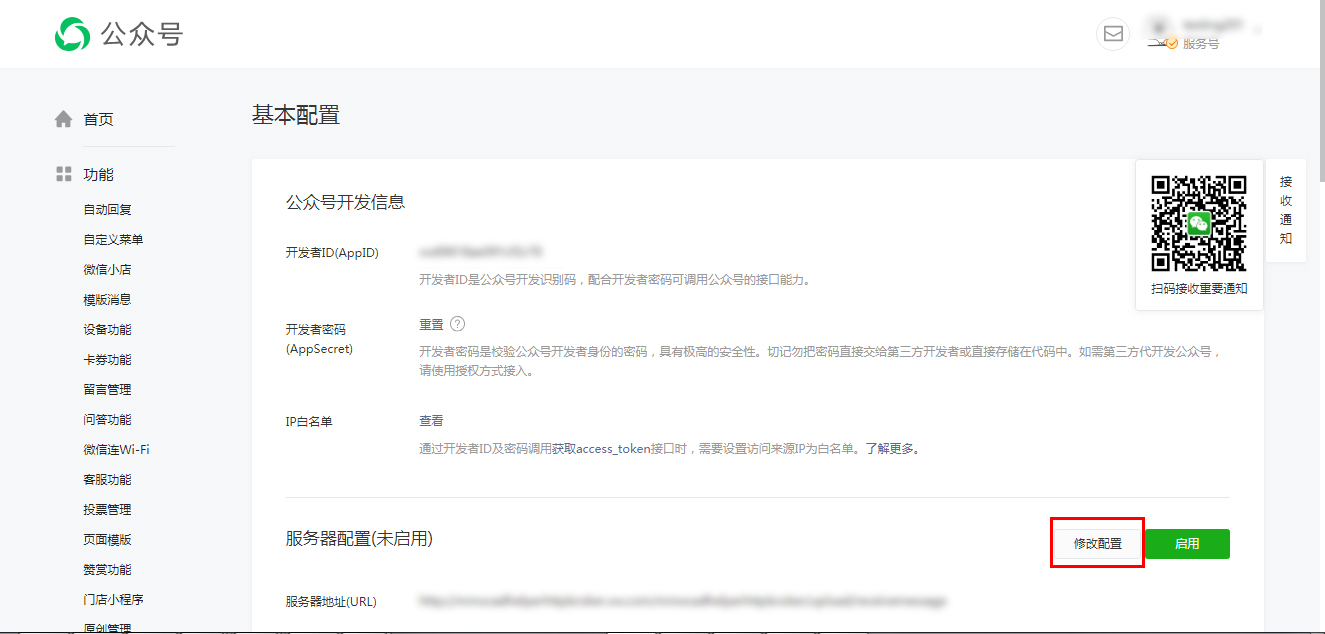
(1)公众平台官网登录之后,找到“基本配置”菜单栏


(2)填写配置 url填写:http://外网IP/wx 。外网IP请到购买成功处查询。 http的端口号固定使用80,不可填写其他。 Token:自主设置,这个token与公众平台wiki中常提的access_token不是一回事。这个token只用于验证开发者服务器。

(3)点击提交,若出现验证token失败请检查服务器配置,或是否修改服务器token字段与微信公众号一致
配置完成,让我们开始写一段逻辑测试一下
修改app.py文件的 handle 函数
def handle():
    try:
        webData = request.get_data()
        recMsg = receive.parse_xml(webData)
        if isinstance(recMsg, receive.Msg) and recMsg.MsgType == 'text':
            # 获取使用者信息
            toUser = recMsg.FromUserName
            fromUser = recMsg.ToUserName
            # 获取信息内容
            get_content = recMsg.Content.decode()
            print(get_content)
            # 编写处理逻辑
            if get_content == "你好":
                # 设置返回内容
                content = "你好,请问有什么是我可以帮助你的吗?"
                replyMsg = replay.TextMsg(toUser, fromUser, content)
                print(isinstance(recMsg, receive.Msg))
                print(recMsg.MsgType)
                return replyMsg.send()
            else:
                return "success"
        else:
            print("暂且不处理")
            return "success"
    except Exception as e:
return str(e)好了,接下来试试发送信息

很好,代码成功运行具体其他功能以及微信接口请参考微信公众号开发文档